We know many list owners have been using tools like Google Forms, Excel Spreadsheets, and even the good ole’ pen and paper, to manage their waitlists before Waitlistr. We’ve made it easier to import your waitlist members into your Waitlistr dashboard.
1) The first step is to create the waitlist you’d like to import into. Once you have that up and ready, you’ll want to head over to the Manage tab.

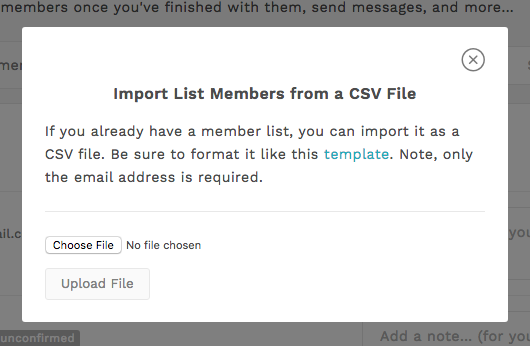
2) On the Manage tab you’ll see a link labeled “Import Members”. Click that and it will launch a modal with the import form.

It’s key to format your data correctly for import. Download our sample CSV file
Tips:
- Only the email address field is required
- Set an “Entered at” date and time in UTC format (e.g. 2017-07-05 23:05:37 UTC) — this will be used to set the position of the list member
- If “Entered at” is left blank, uploaded list members will be appended to the end of your list
3) With the data you’d like to import formatted correctly, click the “Choose file” button to select the file from your computer or device. Then click the “Upload File” button. If you’ve formatted you data correctly you should see a success message.
Troubleshooting
Here are some things you can do to troubleshoot if you do get an error message:
- Make sure you uploaded a CSV file
- Check that the columns match the formatting in this sample file
- If a user is already in our system we don’t allow you to add them to your waitlist. Since users share personal information, we need permission from our existing users before allowing you to add them to your list. Reach out to them directly and ask them to join your waitlist.